Sitecore connecting to MongoDB using SSL

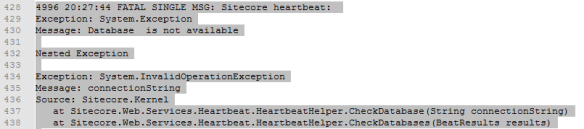
After configuring valid certificates to configure MongoDB for SSL/TLS it is time to establish the communication from Sitecore to MongoDB, and unfortunately Sitecore does not communicate with Mongo using SSL Out of the box.

I found a good article that explain how to achieve it, however, I don’t have any experience on it and had to ask for help to my colleague Leonardo Faggiani

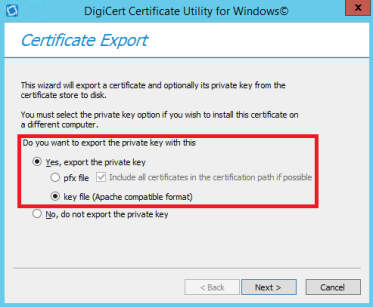
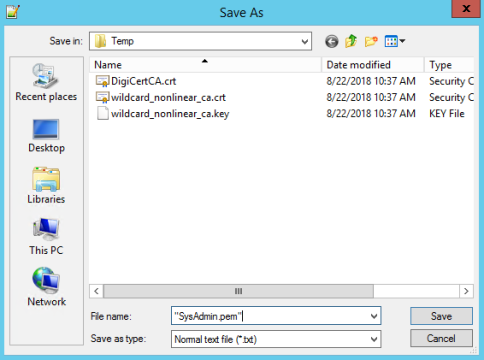
Our first successful attempt was using a PFX file that requires a password but the problem was

Nobody wants to expose password in config files, specially for a PFX file!

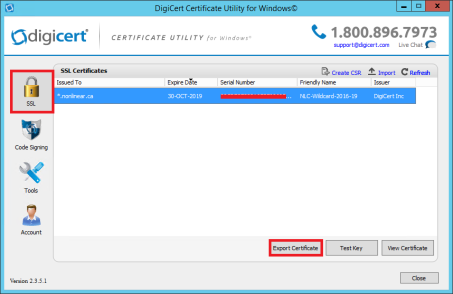
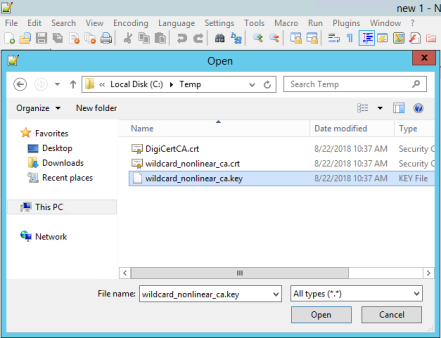
So, we started thinking about using the Windows Certificate Store to retrieve the certificate! And in order to accomplish that, we need to extend UpdateMongoDriverSettingsProcessor class to update Mongo Driver Settings with the SSL certificate.

public class EnableSSL : UpdateMongoDriverSettingsProcessor – This method allow users to turn on/off the SSL settings.

private bool UseSSL()
        {
            string value = Settings.GetSetting("UseSSL");
            return !string.IsNullOrEmpty(value) && Convert.ToBoolean(value);
        }

Self-explaned method
private StoreName? FindStoreName()
        {
            StoreName storeName = StoreName.My;
            try
            {
                storeName = (StoreName)Enum.Parse(typeof(StoreName), Settings.GetSetting("SSLCertificateStoreName"));
            }
            catch (Exception e)
            {
                Log.Error("Error loading store certificate: Settings.GetSetting(SSLCertificateStoreName) " + e.Message, this);
                return null;
            }

            return storeName;
        }

The Certificate Store must be opened in order to find the certificate.

        private X509Certificate2 FindX509Certificate2()
        {
            StoreName? nullableStoreName = FindStoreName();
            if (nullableStoreName == null) return null;

            X509Certificate2 firstCertificate = null;

            StoreName storeName = (StoreName)nullableStoreName;
            X509Store store = new X509Store(storeName, StoreLocation.LocalMachine);

            try
            {
                store.Open(OpenFlags.MaxAllowed);

                var certificates = store.Certificates.Find(X509FindType.FindByThumbprint, Settings.GetSetting("SSLCertificateThumbprint"), false);
                firstCertificate = certificates.Count > 0 ? certificates[0] : null;

                if (firstCertificate == null)
                    Log.Warn("Cannot find certificate with thumbprint " + Settings.GetSetting("SSLCertificateThumbprint"), this);
            }
            finally
            {
                store.Close();
            }

            return firstCertificate;
        }

Overridden method join all the pieces

        public override void UpdateSettings(UpdateMongoDriverSettingsArgs args)
        {
            if (UseSSL())
            {
                X509Certificate2 x509Certificate2 = FindX509Certificate2();

                if (x509Certificate2 == null) return;

                args.MongoSettings.SslSettings = new SslSettings();
                args.MongoSettings.SslSettings.ClientCertificates = new[] { x509Certificate2 };
                args.MongoSettings.SslSettings.CheckCertificateRevocation = false;
                args.MongoSettings.SslSettings.EnabledSslProtocols = SslProtocols.Tls12;
                args.MongoSettings.UseSsl = true;
            }
        }

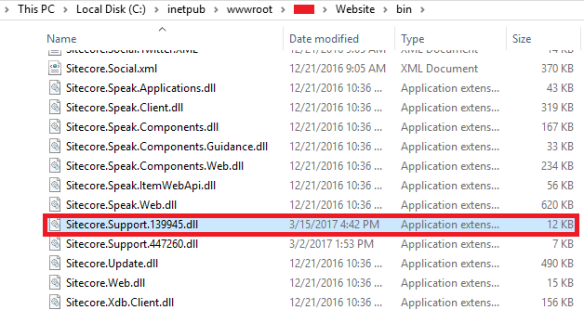
Finally, we need a .config file in order to add those configurations and push the code in the Sitecore’s pipeline

<configuration xmlns:patch=”http://www.sitecore.net/xmlconfig/“>

  <sitecore>

    <settings>

      <setting name=”UseSSL”>

        <patch:attribute name=”value”>true</patch:attribute>

      </setting>

      <setting name=”SSLCertificateStoreName”>

        <patch:attribute name=”value”>My</patch:attribute>

      </setting>

      <setting name=”SSLCertificateThumbprint”>

        <patch:attribute name=”value”>33d567ffc26697605c31ebd4bd87c7254128f049</patch:attribute>

      </setting>

    </settings>

    <pipelines>

      <updateMongoDriverSettings>

        <processor type=”Custom.MongoDriver.EnableSSL, Custom.MongoDriver” />

      </updateMongoDriverSettings>

    </pipelines>

  </sitecore>

</configuration>

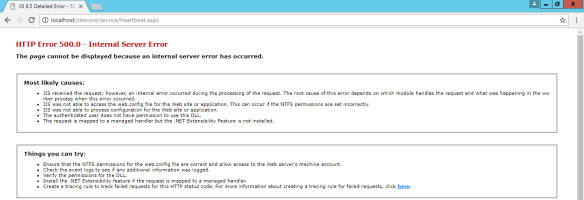
Once we’ve applied it to the Sitecore installation, it didn’t work from beginning and after couple hours troubleshooting here’s what we found to solve it

The Solution

Open Certificate Store

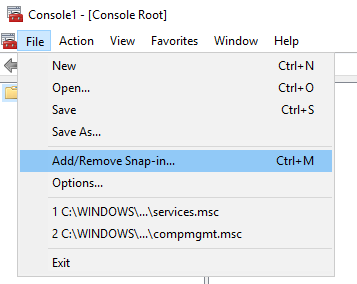
1. Open a Command Prompt window, and type mmc then press Enter
2. On the File menu, click Add/Remove Snap In

mmc-add

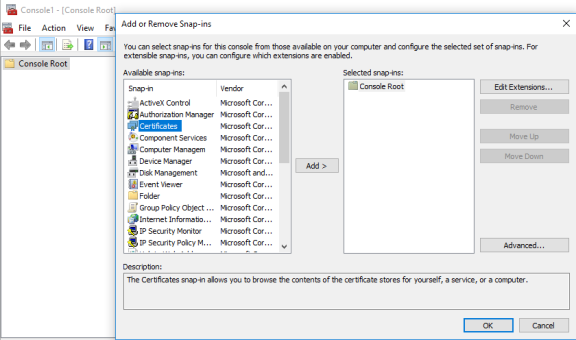
3. Double click Certificates

double-click-certificates.PNG

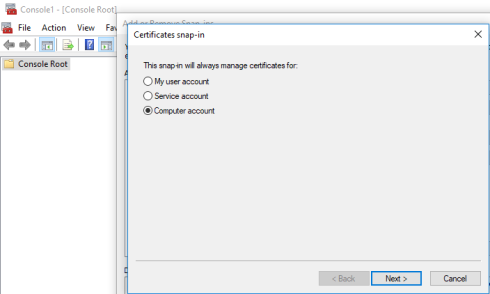
4. Select Computer Account, and click Next

computer-account

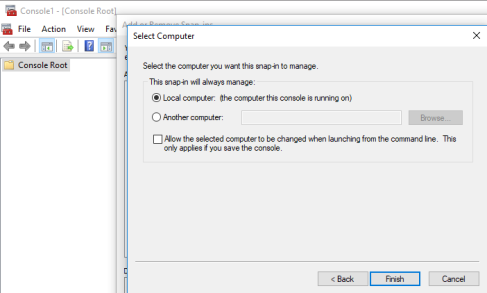
5. Select Local Computer, and click Finish then click OK to exit the Snap-in window

local-computer

Manage Private Key Permissions

Assuming you have the private key installed already, and Certificate Store still open, please follow the steps below

1. In the left pane of MMC, expand Certificates (Local Computer) node, expand the Personal node, and then select the Certificates subfolder

personal-certificates-mmc.png

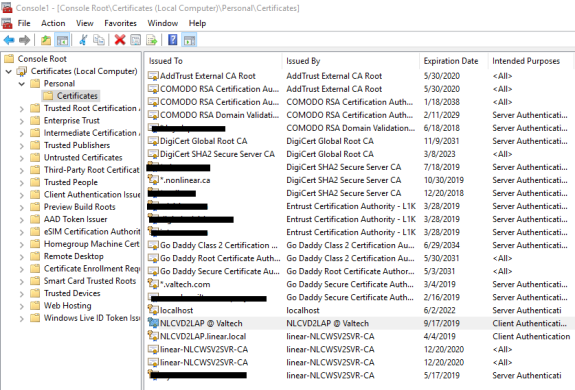
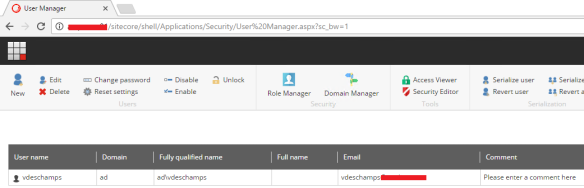
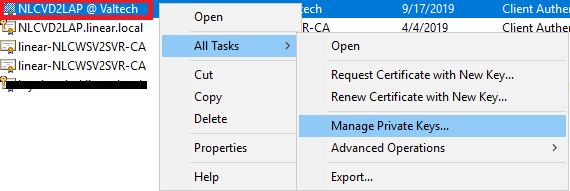
2.  In the right pane, look for your certificate – in my case it is NLCVD2LAP @ Valtech – right-click in the certificate, choose All Tasks, and then choose Manage Private Keys.

manage-keys-certificate

Permissions window shows up, and you have to add the user that is running the Application Pool of your Sitecore instance which could be either ApplicationPoolIdentityNetworkService or a special account just for that.

3. Click Add in the Permissions window, and let’s grant privileges to our Application Pool user

application-pool-user

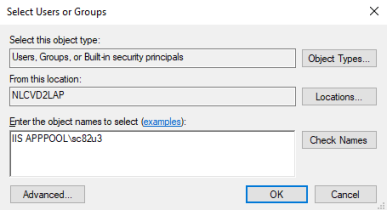
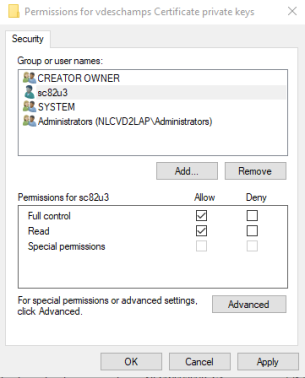
Please note that in my case the Sitecore was running using the ApplicationPoolIdentity using an ApplicationPool named sc82u3

4. Ensure the permissions are Full Control and Read for testing purposes only, then click Ok

permissions-certificate

Once we have done the permission stuff, the solution provided by Leonardo, started to work right away!

I hope you liked it, and thanks for reading!

And I’ll see you on my next post!

Using Valid Certificates to Configure MongoDB for SSL/TLS

I was told to configure MongoDB for SSL/TLS for a production environment which means I would have to use VALID CERTIFICATES!

For production use, your MongoDB deployment should use valid certificates generated and signed by a single certificate authority.

And as I wanted to go fancy, I choose to setup MongoDB with Certificate Validation that requires the creation of two .pem files – one to use as PEMKeyFile and as CAFile parameters in my Mongo configuration file.

Accordingly to MongoDB’s tutorial page, here is what you need to know about them

  • PEMKeyFile with the name of the .pem file that contains the signed TLS/SSL certificate and key.
  • CAFile with the name of the .pem file that contains the root certificate chain from the Certificate Authority.

The first thing to do is to work with the valid certificate you have, usually a PFX format which contains the Public Key and the associate Private Key.

Exporting PFX

Working with certificates sometimes is tricky, I’d recommend to use DigiCert® Certificate Utility for Windows which I use on my daily basis and it is a time-saving tool! Or you can use OpenSSL – that is another GREAT tool.

Moving on… assuming you already downloaded, executed DigiCert Certificate Utility, and that your PFX is already installed in your machine, let’s continue

1. In the DigiCert Certificate Utility for Windows©, click SSL (gold lock), select the certificate that you want to export as a .pfx file, and then click Export Certificate.

1

2. In the Certificate Export wizard, select Yes, export the private key, select key file (Apache compatible mode), and finally click Next

2

3. Choose a location and file name where you want to save the key file, click Save, and then, click Finish

3

4. Navigate to the location you saved, note that the folder should contain the Public Key (wildcard_nonlinear_ca.crt), Private Key (wildcard_nonlinear_ca.key) and Intermediate Certificate (DigiCertCA.crt)

5

PEMKeyFile

In order to generate the PEMKeyFile we will have to use Notepad++ or any other text editor of your preference.

  1. Navigate to the location where are the exported keys, and open the Private Key – in my case wildcard_nonlinear_ca.key6
  2. The Private Key should looks like this7
  3. Copy the entire body of this certificate, including —-BEGIN RSA PRIVATE KEY—- and —-END RSA PRIVATE KEY—-
  4. Open a new tab (or a new text editor), and paste the content you just copied8
  5. Now, let’s open the Public Key (wildcard_nonlinear_ca.crt) that should look like as follows9
  6. Copy the entire body of this certificate, including —-BEGIN CERTIFICATE—- and —-END CERTIFICATE—-
  7. Go to the new text you just created (step 4), and paste the Public Key content in the next line after —-END RSA PRIVATE KEY—-10
  8. Then save this document as .pem file

11

CAFile

The process is pretty much the same listed for the PEMKeyFile, however, the CAFile must have the Root Certificate on it as well. Please ensure to keep the following order:

  1. The Private Key (wildcard_nonlinear_ca.key)
  2. The Primary Certificate (wildcard_nonlinear_ca.crt)
  3. The Intermediate Certificate (DigiCertCA.crt)
  4. The Root Certificate – you should be able to get it directly from the place you issued your certificate, in my case it is named TrustedRoot.crt

Make sure to include the beginning and end tags on each certificate, then save the using .pem extension as well.

MongoDB configuration

Assuming you already have a MongoDB up and running, in order to enable SSL/TLS you must change couple things on the mongod.cfg

net:
ssl:
mode: requireSSL
PEMKeyFile: F:\ssl\SysAdmin.pem
CAFile: F:\ssl\ca.pem

Once you modified it, try to stop/start the MongoDB service and ensure it backs up.

To connect to MongoDB from now on using CMD, you should include the following options

  • –ssl
  • –host
  • –sslPEMKeyFile
  • –sslCAFile

mongo –ssl –host mongodb.mydomain.com –sslPEMKeyFile F:\ssl\SysAdmin.pem –sslCAFile F:\ssl\ca.pem

Sitecore connecting to MongoDB using SSL

I’ve raised the question on Sitecore.Stackexchange and Hishaam Namooya, and Amitabh Vyas were able to address my problems.

Amitabh Vyas said that

OOTB Sitecore does not communicate with Mongo using SSL, we need to implement a custom pipeline for such communication.

Customize the Sitecore.Analytics.MongoDB.Config by defining a new Pipeline.

Now you have two approaches to establish SSL connection between Mongo and Sitecore.

  1. SSL Integration using physical PFX file
  2. SSL Integration reading Machine Key

Please have a look at my blog post for more details.

I hope you liked it, and thanks for reading!

And I’ll see you on my next post!

Sitecore – Heartbeat.aspx throws Error 500 (SOLVED)

A few weeks ago I was working in an installation using Sitecore 8.2 update 2 in a Virtual Machine at Azure.

As per you can see in the diagram below, I have 2 Content Delivery behind a Load Balancer to split the traffic.scenario

After setting up the Azure Load Balancer, I noticed that the traffic never went through and the Virtual Machines weren’t responding on HTTP, so I have decided to test it locally.

Connect locally, and make sure Sitecore is alive

I connected in both CD1 & CD2, and as expected Sitecore loaded up just fine!

Weird! I might be missed something at Azure Load Balancer level.

Connect to Azure Portal and check Load Balancer configuration

I checked configuration by configuration until reached out Health Probe which is used to verify if the website is available or not

healthprobe

So, my HealthProbe is looking for /sitecore/service/heartbeat.aspx, and for some reason cannot use it which is causing the failures to access the website from outside passing by the Azure Load Balancer.

Connect locally, and make sure Heartbeat.aspx works

I connected one more time on both CD1 to access the Heartbeat address http://localhost/sitecore/service/heartbeat.aspx and it was failing with the following error message

heartbeat.aspx_error.png

The same error was occurring on CD2, so let’s dig in!

Check Sitecore logs for detailed information

In Sitecore logs, I have found the following entry

Sitecore_heartbeat_logs

At least tells me something, and looks like Heartbeat didn’t like the way one of my databases in ConnectionStrings.config is set but which one?

I have googled the error and found a post from my colleague and Sitecore MVP Glen McInnis named Azure Traffic Manager and Sitecore Herartbeat where he shows an example to exclude LocalSQLServer and Webforms Remote using Sitecore.Services.Heartbeat.ExcludeConnection inside of Sitecore.config

However, at this point, it wasn’t clear which database was the issue – if any! – and I had to do it by trial and error. And as expected the last show did the trick!

Reporting.apikey was the root cause of it, and accordingly to Sitecore Database Connection Strings for Configuring Servers it is optional for Content Delivery and Content Management Servers!

Well, if that’s the case, then I have two options:

1.Comment out directly on ConnectionStrings.config

<!– <add name=”reporting.apikey” connectionString=”” /> –>

OR

2. Add a proper exclusion using Sitecore.Services.Heartbeat.ExcludeConnection inside of Sitecore.config

<setting name=”Sitecore.Services.Heartbeat.ExcludeConnection” value=”LocalSqlServer|reporting.apikey” />

Recommended read

  1. Sitecore Heartbeat
  2. Azure Traffic Manager and Sitecore Heartbeat
  3. Creating an Internet-facing load balancer using the Azure portal

I hope you liked it, and thanks for reading!

And I’ll see you on my next post!

Sitecore 8.2 – SQL Server Always On Availability Groups

Couple months ago I wrote a post talking about the changes in Sitecore 8.2 from requirements perspective. At that time, I didn’t know about the support of SQL Server Always On Availability Groups!

Microsoft SQL Server Always On is only supported in Sitecore 8.2 and later

For many years High Availability and Disaster Recovery in SQL Server relied on Mirroring, Clustering, Log Shipping and couple others. Since SQL Server 2012 it is possible to enjoy all the benefits listed as follows:

Although it has been available since SQL Server 2012, Sitecore firs introduced Always On support on the initial release of its 8.2 version.

And how can I tell to my Sitecore to use my SQL Server Always On?

First of all, make sure you are running Sitecore 8.2 or later!

Second thing, you will need to change the way the ConnectionStrings.config connects to the SQL Server as you can see below:

<add name="master" connectionString="user id=sa;password=YourPasswordHere;Data Source=MySQL;Database=Sitecore_Master;ConnectRetryCount=10;ConnectRetryInterval=5" />

The new parameters ConnectRetryCount and ConnectRetryInterval are a reflection of the time it takes in seconds for a failover to complete.

BONUS!
In Sitecore.config there’s a parameter named Retryer which can be increased, and also used for debug purposes as you can see below:

<retryer disabled="false" type="Sitecore.Data.DataProviders.Retryer, Sitecore.Kernel">
<param desc="Number of tries">30</param>
    <param desc="Interval between tries">00:00:01.000</param>
    <param desc="Log each exception (should be used for debug only)">false</param>
 </retryer>

BONUS! BONUS!

As soon as I finished this post, it came to my mind “How Sitecore controls the communication with SQL Server Always On?” and I thought “LET’S ASK”, then I went to http://sitecore.stackexchange.com/

And thanks to Richard Seal, now I know that the SqlConnection object handle that and it is part of .NET!

If you are more interested on my question and on the answer, check out here

I hope you liked, thanks for reading! I’ll see you on my next post!

Sitecore 8.2 – From requirements perspective, what has changed?

Everyone excited with Sitecore’s new release, now we are at 8.2!!!!

VopKq.gif

And have you had the opportunity to went through all new stuff? Well, follow me and I’ll show you from requirements perspective what has changed in Sitecore 8.2.

Operating System

“Sitecore XP 8.2 is only compatible with the client and server operating systems that support .NET Framework 4.5.2”

Based on this quote, here is the list sorted from newest to oldest

  • Server
    • Windows Server 2012 R2 (64-bit)
    • Windows Server 2012 (64-bit)
    • Windows Server 2008 R2 SP2 (32/64-bit)
  • Workstation
    • Windows 10 (32/64-bit)
      • Home
      • Education
      • Professional
    • Windows 8.1 (32/64-bit)
      • Enterprise
      • Professional
      • Core
    • Windows 8 (32/64-bit)
      • Enterprise
      • Professional
      • Core

Please note that accordingly to Sitecore Installation guide 8.2 the following Operating System are not compatible anymore

  • Windows Server 2008 SP2+ (32/64-bit)
  • Windows 7 SP1+ (32/64-bit)
  • Windows Vista SP2+ (32/64-bit)

.NET Framework

“Sitecore XP requires .NET Framework 4.5.2” and “You must apply any available updates to the .NET Framework to every Sitecore installation”

In addition to the information above, you’ll need to change web.config file from:

<configuration>
    <system.web>
       <httpRuntime/>
    </system.web>
</configuration>

to

<configuration>
    <system.web>
       <httpRuntime targetFramework="4.5.2" />
    </system.web>
</configuration>

Databases

  • MongoDB Database
    • Mongo 3.2 Enterprise with data-at-rest encryption, WiredTiger only
    • Mongo 3.2 MMAPV1 or WiredTiger
    • Mongo 3.0 MMAPV1 or WiredTiger
    • Mongo 2.6 MMAPV1

In today’s post we won’t dig into MMAPV1 or WiredTiger, but please have a look here and discover what’s it.

And last but not least, Sitecore is supporting Oracle again, however please be aware

“The Oracle database storage setup is only available when Sitecore XP is running in Sitecore Experience Management mode (CMS-only mode), which lets you to run Sitecore XP without the Experience Database (xDB) enabled”

  •  Oracle
    • Oracle Database 11g R2 (11.2)

Since Sitecore 7.0, Oracle Database wasn’t supported as you can check here

Thanks for reading and I hope you liked it!

I’ll see you on my next post.